Bake Grainy Peanut Butter & Jelly Delight
- Recipe Overview
- Key Benefits
- Your Essential Ingredients Guide to Bake Grainy Peanut Butter & Jelly Delight
- Getting Started with Professional Cooking
- Pro Tips & Secrets for Your Bake Grainy Peanut Butter & Jelly Delight
- Perfect Presentation Matters
- Storage & Make-Ahead Tips
- Creative Variations
- Complete Nutrition Guide
- Expert FAQ Solutions
- 📝 Recipe Card
You ever have one of those days when all you really need is a big ol’ hug…from food? i’m talkin’ about something warm, ooey gooey, and oh-so-nostalgic.
I found my answer recently when i decided to bake grainy peanut butter & jelly delight . to say it hit the spot is an understatement.
This isn’t just your average dessert; it’s a warm blanket for your taste buds and a flashback to childhood lunches!
I remember the first time i made this treat. i was digging through my pantry, trying to figure out what to whip up for a cozy afternoon snack.
I stumbled upon some grainy peanut butter and jelly, and my mind immediately took a trip down memory lane. you know, back to those good ol’ days when peanut butter and jelly sandwiches were basically gourmet meals on the playground.
Recipe Overview
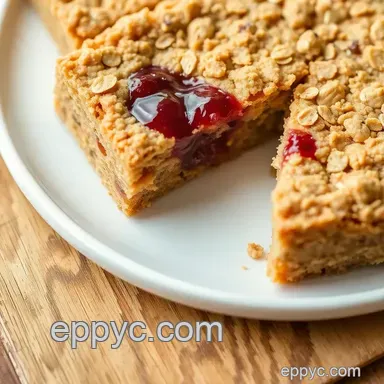
The bake grainy peanut butter & jelly delight is a delightful nod to the classic peanut butter treat that we all know and love.
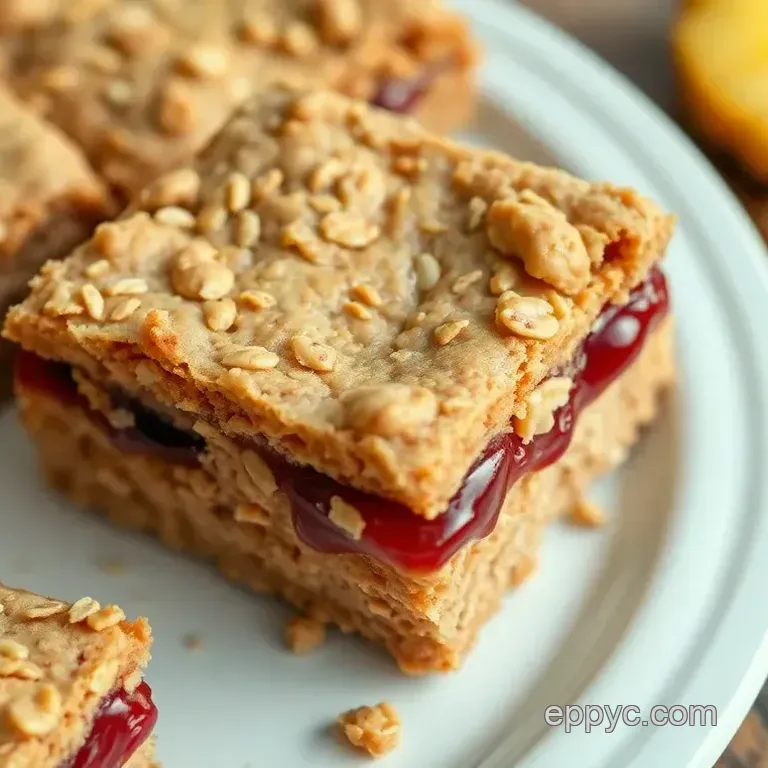
It combines a crumbly grainy base with rich, creamy peanut butter and sweet jelly. this dessert is a twist on what many folks might remember from their childhood, yet it remains trendy today.
People are all about wholesome baked snacks that hit that perfect balance of simple dessert ideas and comfort food recipes.
Now, don’t worry this recipe isn’t some all-day affair. you’ll need about 15 minutes for prep , throw it in the oven for 25 to 30 minutes , and voilà! you’ve got yourself a delicious dish ready to be cut into squares.
And for the budget conscious, this recipe won’t break the bank either. you can whip up 9 servings without needing to sell your soul (or your firstborn).
Key Benefits
Not only is this dish a piece of cake to bake, but it’s also packed with health benefits. when you use whole wheat flour and grainy peanut butter , you’re trading refined ingredients for something that’s a whole lot better for you.
This dessert is nutritious and hearty, perfect for breakfast treats or casual afternoon munchies.
One of the best parts? it’s flexible! you can serve it warm out of the oven with a scoop of vanilla ice cream, or cool it down for a cozy snack.
It shines at special occasions too, whether it’s a family gathering or a bake sale favorite. everyone loves good layered snack bars .
Plus, if you’re looking for family friendly dessert recipes , this one’s a keeper your kids will adore it!
Unlike other recipes that might taste too sweet or overly processed, this wholesome baked snack maintains that perfect sweetness balance with the sweet and savory notes of jelly and the nutty richness of the peanut butter.
Seriously, it’s like a hug in dessert form!
So whether you’re diving into it as an after school snack or serving it at your next potluck, you’re in for a delightful treat.
With that said, let’s chat about what you’ll need to get started with this yummilicious peanut butter and jelly bake .
Are you ready to dig deeper into the ingredients? Trust me, you're gonna want to stick around!
Your Essential Ingredients Guide to Bake Grainy Peanut Butter & Jelly Delight
Alright, folks, let’s chat about the essentials you’ll need for whipping up a comforting classic bake grainy peanut butter & jelly delight .
This recipe isn’t just a treat; it's a nostalgic hug in dessert form! if you’re all about quick snacks or looking for a cozy breakfast option, you’ve landed in the right spot.
So, let’s dive in and get you all set up with the must haves!
Premium Core Components
First up, let’s talk about ingredients . You know they say, “Good food equals good mood,” and let me tell you, it starts with high-quality components. For this delight, you'll need:
- Whole wheat flour : 1 ½ cups (190 g)
- Brown sugar : ½ cup (100 g), packed
- Baking powder : ½ teaspoon
- Salt : ¼ teaspoon
- Unsalted butter : ½ cup (120 ml), melted
- Grainy peanut butter : 1 cup (240 g)
Pro tip: When buying peanut butter, look for the kind with simple ingredients just peanuts and maybe a pinch of salt. This gives you that rich flavor without any weird stuff.
As for storage, keep your pb in a cool, dark place. and honestly, it’ll last longer than that bag of chips you bought on impulse.
Aim for about 6 months if it’s sealed tight.
Signature Seasoning Blend
Now, let’s sprinkle in a bit of creativity! you can enhance the flavor of our bake grainy peanut butter & jelly delight with some signature seasoning blends .
Think about adding a dash of cinnamon or even nutmeg to the crust for a cozy vibe.
You can also get funky with herb selections . don’t worry; no basil here just yet! save those for your savory dishes.
This sweet opportunity is all about sweet spices that contrast beautifully with the nuttiness of peanut butter.
And hey, if you want to go off the rails, consider some regional variations . you could swap in a homemade berry jam instead of the store-bought jelly.
It’s super easy, and who doesn’t love a little personal touch?
Smart Substitutions
Life happens, right? sometimes, you don't have the exact ingredients on hand. don’t panic. here’s where smart substitutions come into play.
If you’re out of whole wheat flour , regular all-purpose flour works just fine.
Got a nut allergy? No sweat! Use sunflower seed butter instead of peanut butter. It’s surprisingly delicious. Plus, if you're feeling adventurous, you can even rib the jelly for some fresh fruit filling; just think of those summer strawberries!
Kitchen Equipment Essentials
Let’s get down to the nitty gritty— kitchen equipment . You really don’t need a fancy schmancy kitchen for this. To make our Bake Grainy Peanut Butter & Jelly Delight, you’ll need:
- Mixing bowls : You know, the classic standbys.
- A 9x9-inch baking dish : This is your magic square!
- Whisk or fork : A fork will do the trick if you don’t have a whisk handy.
- Parchment paper : This is optional but will save you hassle when it comes time to cut those perfect squares later.
- Offset spatula or rubber scraper : To spread that jelly evenly and avoid sticky situations!
These tools are your best friends! Store them in an easy-to-reach spot, and trust me, you’ll be glad you did when the baking bug bites.
Wrapping it Up
Now that you're armed with the essentials for your bake grainy peanut butter & jelly delight, you're ready to tackle those luscious layers and enjoy the cozy vibes it brings.
Creative twists, fresh ingredients, and simple substitutions are all part of the fun. so get your gear out, roll up your sleeves, and prepare for a baking adventure that is sure to bring smiles.
Stay tuned for those step-by-step instructions to kick this recipe into high gear!
Before you know it, you’ll have a whole batch of delicious peanut butter layer bars to share or keep all to yourself, i won’t judge! trust me, your family will love the warm, gooey goodness of this grainy peanut butter dessert that screams comfort food.
Getting Started with Professional Cooking
Look, i get it. cooking, especially on a professional level, can be a little intimidating. but honestly, once you break it down into bitesized steps, it’s a whole lot easier.
So, let’s grab our aprons and dive into this!
Essential Preparation Steps
First things first: mise en place. that fancy french term basically means “everything in its place.” before you start cooking, prep your ingredients.
Measure out your whole wheat flour, grainy peanut butter, and jelly. it saves time and makes the cooking process feel less chaotic.
Trust me, once you're in the zone, you'll be glad everything's ready to go.
Next, let’s talk time management. you want to have a game plan. for our bake grainy peanut butter & jelly delight , you’re looking at about 1 hour and 15 minutes all in.
That’s 15 minutes to prep and 30 minutes to chill before we hit the oven for 25- 30 minutes .
Keep an eye on that clock so you can serve it warm and gooey!
Staying organized is also key. keep your workspace tidy and your ingredients within reach. a clean environment is a happier one.
Plus, safety is paramount! always be mindful of where your hands are and what’s cooking. no one wants to end up with a burnt finger while they’re trying to whip up a cozy afternoon snack.
Step-by-step Process
Alright, let’s get to the good stuff. Here’s how to whip up this layered peanut butter dessert like a pro:
- Preheat your oven to 350° F (that’s about 175° C for my non-American friends).
- Prepare your baking dish . Grease a 9x9-inch dish so that your dessert doesn’t stick.
- Mix the dry ingredients : flour, brown sugar, baking powder, and salt.
- Now, add the wet ingredients : melted butter and that glorious grainy peanut butter. Mix until combined your arms might get tired, but it’s worth it!
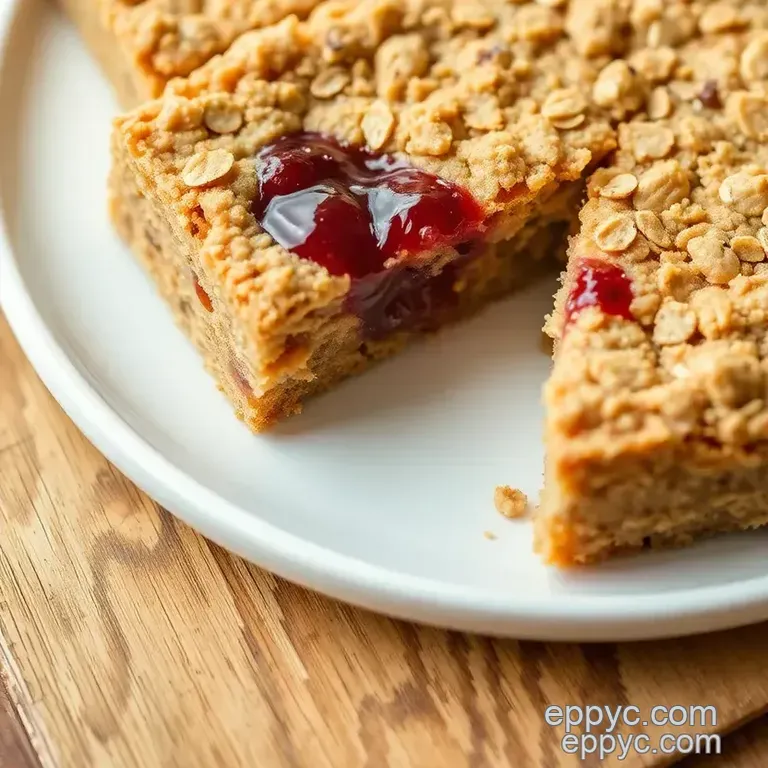
- Press 2/3 of the mixture into your dish. This is going to be the crust.
- In a separate bowl, stir your jelly until it’s smooth. Then spread it evenly over the crust.
- Crumble that remaining mixture on top and, if you’re feeling fancy, sprinkle some chopped nuts over it.
- Bake for about 25- 30 minutes until the top looks golden brown.
- Once it’s done, let it cool for at least 15 minutes . Patience is a virtue here!
Expert Techniques
Now that you’ve got a basic handle on the steps, let’s dive into some expert techniques. Here’s where it gets real:
- Choose quality ingredients. A delicious peanut butter layer bar starts with quality ingredients. Go for that natural peanut butter without all the added junk.
- Look for visual cues. If it’s all golden brown and bubbling in the oven, chances are you’ve nailed the bake time.
- Troubleshooting tip: If your dessert is too crumbly, you might not have added enough butter, so keep that in mind for next time.
Success Strategies
We’ve all been there: one small slip-up leads to a mighty disaster. Here are common mistakes you can avoid:
- Ensure your measurements are precise. Incorrect ratios can lead your layered peanut butter dessert to become a gooey mess.
- Do not skip the chilling step! It helps the dessert cooperate better when it comes to slicing; no one likes a crumbly square.
- Keep an eye on it while baking. Timing is everything! When you see that golden color and the edges start to pull away, it's a sign it’s ready!
And hey, if you're in a rush, this recipe also allows for make-ahead options ! you can prep it the night before and bake it in the morning for a delightful breakfast treat with peanut butter.
And that’s it! Now, you’ve got the basics down on how to Bake Grainy Peanut Butter & Jelly Delight with an expert touch.
As you get comfortable with these steps, you'll start feeling like a pro yourself. So, before we wrap up, let’s dive into some Additional Information for maximizing this delicious treat’s potential and more baking tips to keep your kitchen game strong!
Pro Tips & Secrets for Your Bake Grainy Peanut Butter & Jelly Delight
Let’s start off with some chef’s secrets ! first off, if you want your bake grainy peanut butter & jelly delight to be a hit, choose quality ingredients .
Seriously, not all peanut butter is created equal. a creamy, high-quality peanut butter can make your dessert sing. plus, adding a pinch of cinnamon or nutmeg to your crust will really amp up those flavors.
Oh my gosh, trust me on this one!
If you’re short on time, here’s a little time saving trick : while the crust is chilling, you can prep your jelly filling .
Just mix that jelly with a bit of lemon juice. it really brightens up the flavor. and speaking of flavor, don’t skip the nuts on top ! they add a fantastic crunch and depth.
Also, let’s talk presentation. a great dish deserves great vibes, right? after they’re baked, let them cool a bit and then slice them into squares.
But don’t just toss them on a plate. use a pretty platter or arrange them in a way that shows off those layers.
A little sprinkle of chopped peanuts or a drizzle of honey wouldn’t hurt either.
Perfect Presentation Matters
You know what really makes a dessert pop? good plating. grab that cute plate you have stashed away and start by layering your squares artistically.
You can use some fresh fruit or a dollop of whipped cream on the side. if you’re feeling fancy, how about a little drizzle of chocolate sauce? visual appeal goes a long way, and it’s not just about taste it’s about that first impression too.
When it comes to garnishing , think colors! Strawberries or raspberries can really brighten up your plate. Aim for a nice mix of colors to create that Instagram worthy look.
Storage & make-ahead Tips
Alright, let's get practical sometimes life gets busy, and you don't have time for baking. no worries! this delightful treat can be prepped ahead of time .
Store it in an airtight container at room temperature, and it’ll be good for about three days. i recommend letting them sit for a day as the flavors meld and get even better!
If you've got leftovers (which you probably won't because they're that good), just keep them wrapped up tightly. for a longer storage solution, pop them in the fridge for up to a week or freeze for a later treat.
To reheat, just toss them in the oven at a low temperature for a few minutes until warm. ahh, the joy of comfort food recipes!
Creative Variations
Now, let’s talk about getting a little creative! the beauty of this peanut butter and jelly bake is that you can mix things up.
How about adding in chocolate chips? just fold them into your crust mix for a sweet twist.
Dietary modifications can be super easy too. If you’re opting for a nut-free version, swap out the peanut butter for sunflower seed butter. It's a great alternative, serviceable for nut-free environments.
And for a seasonal twist, consider using different jelly flavors based on what's in season. Maybe a peach or blueberry jelly during summer it’s like a flavor party in your mouth!
Complete Nutrition Guide
Let’s be real: knowing what you’re eating is important. this bake grainy peanut butter & jelly delight isn’t just a treat, it’s packed with wholesome ingredients, especially if you use whole wheat flour .
Per serving, you’re looking at about 210 calories , which isn’t too bad for a dessert. each square contains about 5g of protein and 3g of fiber .
Perfect for those cozy afternoons when you crave something sweet but want to keep it guilt free! plus, how cool is it to know you’re enjoying a treat that gives a nod to healthy peanut butter recipes ?
Expert FAQ Solutions
Got questions? I totally get that! Here are some common ones I’ve faced while making this delightful treat:
1. Why is my crust not sticking together? – Be sure to chill your mixture. It helps the butter firm up!
2. Can I use regular flour instead of whole wheat? – Absolutely! They’ll still taste great.
3. How do I know when it’s done baking? – Look for that golden brown color on top.
Ready to tackle this bake grainy peanut butter & jelly delight? you’ve got this! whether it’s a special occasion, a bake sale favorite, or just a cozy afternoon snack, this dessert celebrates all the goodness of peanut butter and jelly.
Don't be afraid to get creative and make it your own. happy baking, friend!
Bake Grainy Peanut Butter Jelly Delight